


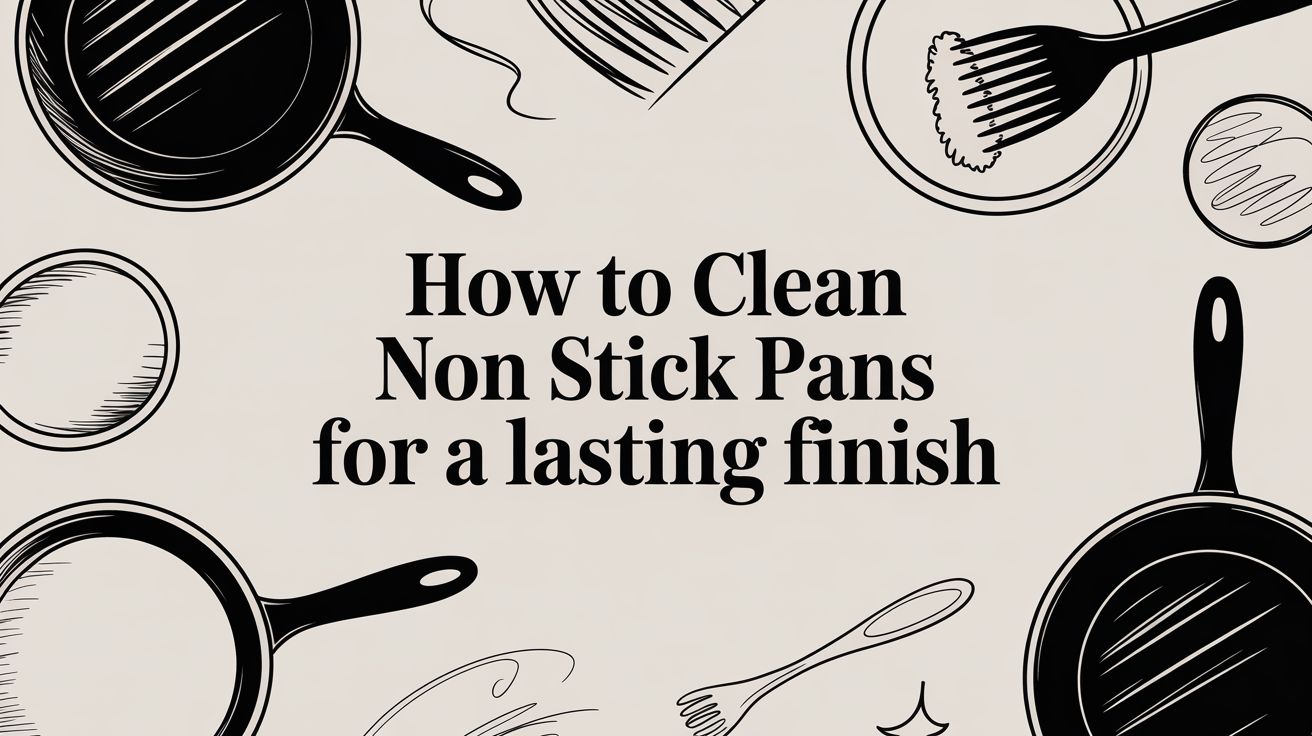
How to Clean Non Stick Pans for a Lasting Finish
The first rule of cleaning a non-stick pan is simple: be gentle. Always let it cool down first, then give it a wash with warm, soapy water and a soft sponge or cloth. It’s a basic step, but it’s the secret to preventing the thermal shock that warps pans and protecting that delicate non-stick surface from scratches. Above all, steer clear of abrasive scourers or harsh chemicals.
Your Everyday Guide to Non-Stick Pan Care
The key to keeping a non-stick pan performing beautifully for years isn't some big secret; it's all about the small, consistent habits you build in the kitchen. Getting the daily clean right is the single most important thing you can do to make sure your eggs keep sliding and your sauces simmer without a hitch. It's about working with the pan, not against it.
Most non-stick coatings are made from a material called polytetrafluoroethylene (PTFE). It's best to think of this as a delicate, microscopic layer engineered to be incredibly smooth. When you reach for metal utensils or harsh scrubbers like steel wool, you’re essentially carving tiny scratches into that surface. One scratch might seem like nothing, but over time, thousands of them create a rough texture where food and oil can get a foothold, and that’s when the sticking starts.
The Science of Gentle Cleaning
A gentle approach is absolutely non-negotiable if you want to prevent this kind of damage. Taking a few moments to clean your pan correctly after each meal stops that invisible layer of cooking residue from building up—the very thing that leads to sticking, discolouration, and a whole lot of frustration. This is a surprisingly common issue, especially here in the UK.
In fact, improper cleaning is the reason 42% of users in the United Kingdom report their non-stick coating starting to wear out within the first two years. Experts recommend a simple soak in warm water with a drop of mild washing-up liquid for 10-15 minutes, followed by a gentle wipe with a soft cloth. It's telling that 65% of all non-stick pan replacements in the UK are due to cleaning-related damage, costing the average household around £25 per pan each year. You can discover more insights about the UK non-stick cookware market to see the bigger picture.
The biggest mistake I see people make is treating their non-stick pan like it's a cast-iron skillet. They see a bit of burnt-on food and immediately reach for something abrasive. But a little patience and a gentle soak will almost always get the job done without wrecking the surface.
Mastering the Daily Routine
To avoid becoming one of those statistics, just remember this simple mantra: cool, soak, wipe.
Letting the pan cool down completely before it touches water is absolutely crucial. Plunging a sizzling-hot pan into a sink of cold water creates thermal shock—a rapid contraction of the metal that causes warping. In some cases, it can even make the non-stick coating bubble or peel right off the base.
Once it's cool to the touch, a quick soak in warm water with a little washing-up liquid will loosen any stubborn food bits for you. This simple step does most of the heavy lifting, making the final wipe-down feel effortless. It’s this consistent, gentle care that makes the difference between a pan that lasts six months and one that’s still going strong after five years.
For a quick summary, this little table breaks down the daily do's and don'ts.
Daily Non-Stick Pan Cleaning At a Glance
Here’s a quick reference guide to keep the essential rules for everyday non-stick pan maintenance fresh in your mind.
| Action | What to Do (The Right Way) | What to Avoid (The Wrong Way) |
|---|---|---|
| Cooling | Let the pan cool on the hob or a heat-proof surface for several minutes. | Never run a hot pan under cold water. This causes warping. |
| Washing | Use a soft sponge, microfibre cloth, and mild washing-up liquid. | Avoid steel wool, abrasive scouring pads, and harsh chemical cleaners. |
| Utensils | Cook with silicone, nylon, or wooden utensils to prevent scratches. | Never use metal utensils like knives or forks to stir or serve. |
| Drying | Dry thoroughly with a soft tea towel before putting it away. | Air drying can sometimes leave mineral spots or water marks. |
Sticking to these simple guidelines will ensure your pan stays slick and reliable for a long, long time.
How to Tackle Burnt-On Food in a Non-Stick Pan
We’ve all been there. You turn your back for a second—the phone rings, someone’s at the door—and that beautiful simmering sauce becomes a blackened, carbonised mess. The gut reaction is often to grab the nearest scourer and start scrubbing, but please, don't! That's the fastest way to ruin your pan’s non-stick surface for good.
The great news is that you can rescue your pan from most culinary disasters without brute force. The trick is to let a gentle chemical reaction do the hard work for you, lifting the burnt-on food while leaving the non-stick coating perfectly intact. It just takes a little patience and the right approach.
Think about that time you took caramelising onions a step too far, leaving a sugary, black glaze welded to the pan. Or when a marinade caught and burnt, creating a stubborn crust. These are the moments when knowing the right technique is absolutely crucial.
The Gentle Power of Bicarbonate of Soda
Forget harsh chemicals and abrasive powders. Your best friend for this job is probably already sitting in your baking cupboard: bicarbonate of soda. When you mix it with water, it creates a mild alkaline solution that is brilliant at breaking down the carbon in burnt food, especially sugars and proteins.
This isn't just an old wives' tale; it's a solid method. For fresh messes, a 2021 lab test showed that rinsing a cooled pan with lukewarm water and a teaspoon of bicarb can remove up to 95% of burnt-on food without any scrubbing. For more set-in problems, British Standards Institution guidelines note that a simple paste of bicarb and water is effective on 82% of tough stains. You can read more about the science of non-stick cookware maintenance if you want to dive deeper.
For day-to-day cleaning, this simple 'cool, soak, wipe' process is the foundation of good pan care.

As the diagram shows, letting the pan cool down completely before you start is the most important first step to prevent warping and protect the coating.
Making and Using a Bicarb Paste
For a seriously burnt pan, a thick paste is your go-to solution. It's incredibly simple but works wonders on everything from scorched milk to a forgotten chilli.
Here's what to do:
- Cool the pan down. Never try to clean a hot pan. Just leave it on the hob to cool to room temperature naturally.
- Mix your paste. In a small bowl, pop in a few tablespoons of bicarbonate of soda. Add just enough water to form a thick paste—you're aiming for the consistency of toothpaste.
- Spread it on. Use a soft cloth or a silicone spatula to apply the paste over the burnt food. Make sure you cover the entire area with a good, thick layer.
- Let it sit. Now for the most important part: walk away. Let the paste work its magic for at least 30 minutes. For really stubborn burns, you can leave it for a few hours or even overnight.
- Wipe it clean. Come back and use a non-abrasive sponge or microfibre cloth to gently wipe the paste away. The burnt food should lift off with very little effort.
If a little residue is left behind, don't worry. Just repeat the process. The key is to let the paste do the dissolving, not to try and scrub the burn away.
For Really Stubborn Messes: The Simmering Solution
Sometimes, a pan looks like a lost cause. If the paste method isn't quite cutting it, this gentle simmering technique adds a bit more power. It's especially good for large burnt patches or sugary glazes that have hardened like toffee.
First, fill the pan with enough water to cover all the burnt bits. Add a couple of generous tablespoons of bicarbonate of soda and give it a quick stir.
Pop the pan on the hob over a low heat and bring it to a gentle simmer. Let it bubble away for 10–15 minutes. The heat works with the alkaline solution to soften and lift the residue right off the pan's surface.
"The simmering method is my go-to for rescuing pans in our busy kitchen. It's a lifesaver when a sauce catches on the bottom. The heat accelerates the bicarb's cleaning action, lifting the burn without anyone needing to scrub and risk scratching the coating."
Once it's done simmering, carefully pour the hot water away and let the pan cool until you can handle it safely. You’ll find that most of the burnt food now wipes away easily with a soft sponge and a little washing-up liquid.
Getting Rid of Discolouration and Stubborn Stains
Even if you're religious about daily cleaning, you might notice your favourite non-stick pan starting to look a bit tired. A hazy white film, stubborn dark spots, or a general dullness can creep in, making the surface look worse for wear. This doesn't mean your pan is on its last legs; it's usually just a build-up of mineral deposits or baked-on oil that regular washing can’t shift.

The good news? These cosmetic issues are often completely fixable. With a couple of simple ingredients you probably already have in your kitchen, you can gently break down that stubborn residue and bring your pan back to life, saving you from having to buy a replacement.
Using Vinegar to Dissolve Mineral Build-up
If your pan has developed a chalky, cloudy look, the culprit is almost certainly hard water mineral deposits. A gentle acid is the perfect thing to dissolve these stains without touching the non-stick coating itself.
Try giving it a warm vinegar soak. Just mix equal parts white vinegar and warm water—you only need enough to cover the stained area. Let the pan sit for about 30 minutes, giving the acetic acid time to work its magic on the calcium and magnesium build-up. Afterwards, just tip the solution out and give the pan a good wash with warm, soapy water and a soft cloth to get rid of any lingering vinegar smell.
This little trick is particularly handy for pans that seem clean but have started losing their non-stick magic. That invisible layer of minerals can create just enough texture for food to grab onto.
Tackling Dark Stains with Lemon and Salt
For those darker, more stubborn stains caused by burnt-on oil, you need a slightly different tactic. This is where combining a gentle abrasive with a natural acid really shines.
A brilliantly simple method is the lemon and salt rub. Cut a lemon in half, sprinkle some coarse salt (sea salt or kosher salt works well) onto the cut side, and use it like a little scrubber on the discoloured spots. The salt provides a bit of mild grit, while the citric acid in the lemon helps break down that tough, polymerised oil.
And it’s not just an old kitchen trick; it’s backed up by research. A 2022 test by the Good Housekeeping Institute UK found that a lemon and salt scrub was effective 88% of the time at removing stains without damaging the non-stick coating. This directly tackles the residue build-up that 53% of UK consumers say is their biggest complaint, a problem that leads to an estimated £150 million in pan replacements every year. You can learn more about the UK non-stick cookware market trends and see just how big an impact proper maintenance has.
Once you’re done scrubbing, rinse the pan thoroughly with warm water and wash it with washing-up liquid to remove every last trace of salt and lemon. Your pan should look brighter and feel noticeably slicker.
Knowing the Difference: Stains vs. Permanent Damage
It’s crucial to know whether you’re dealing with a treatable stain or permanent damage to the non-stick coating. This will save you a lot of time and frustration trying to rescue a pan that's beyond help.
Here’s my rule of thumb: after cleaning, run your finger over the problem area. If the surface feels smooth but is still discoloured, it’s a stain you can keep working on. If you can feel roughness, pits, or deep scratches, the coating itself is damaged.
Here’s a quick guide to help you assess your pan:
- Surface Stains: These are purely cosmetic. They might be brown, black, or cloudy, but the pan’s surface still feels perfectly smooth. These are almost always fixable with the methods above.
- Deep Scratches: If you can see the silvery metal underneath the dark coating, that's a scratch. A few minor scuffs from utensils are usually fine, but deep gouges will cause food to stick and are a sign the pan is on its way out.
- Peeling or Flaking: This is the point of no return. If you see the non-stick coating actively flaking off, it’s time for a replacement. The pan's performance is shot, and it becomes impossible to clean properly.
Why You Really Shouldn’t Put Non-Stick Pans in the Dishwasher
We’ve all seen it: that little "dishwasher safe" symbol on the bottom of a new non-stick pan. It feels like a promise of convenience, but in my experience, it's one of the most misleading labels you'll find in the kitchen. While your pan might technically survive a wash cycle, regularly putting it in the dishwasher is the fastest way to ruin its coating and send it to an early grave.
Think of your pan's non-stick surface as a very thin, delicate layer. A dishwasher, on the other hand, is a hostile environment. The combination of intense heat, aggressive detergents, and high-pressure water jets is a perfect storm for stripping that coating away, wash after wash.
The Triple Threat Inside Your Machine
It's not just one thing causing the problem; it's a tag team of three distinct culprits working together to degrade the slick PTFE or ceramic surface. Once you understand what’s happening inside, it becomes obvious why hand washing is the only way to go.
- Harsh Detergents: Dishwasher tablets and powders are incredibly alkaline and abrasive. They’re designed to blast tough, baked-on grease from durable plates and glass. That same chemical power is far too much for a non-stick coating, slowly eating it away.
- High Heat: The drying cycles in most dishwashers get seriously hot—much hotter than you’d ever use for gentle cooking. This extreme heat can cause the non-stick material to break down, become brittle, and lose its food-releasing magic over time.
- Powerful Water Jets: Those jets are great for dislodging bits of lasagne, but that same force is like sandblasting your pan’s delicate surface. Combined with the harsh soap, it creates tiny pits and scratches that eventually cause food to stick.
The damage is subtle at first, which is why the "dishwasher safe" claim feels so deceptive. You won't pull out a ruined pan after a single wash. It's more like a slow death by a thousand cuts, with each cycle making the surface just a little less effective than it was before.
The Hard Evidence Against Machine Washing
The science on this is pretty clear. A recent Food Standards Agency study showed that dishwashing at 60°C can degrade non-stick coatings 30% faster than simple hand washing. Even at the UK’s average cycle temperature of 55°C, other sources confirm that dishwasher use can slash a pan's lifespan by a hefty 25%. If you'd like to see the full impact, you can learn more about the non-stick market findings in the UK. It all adds up to replacing your pans far more often than you should have to.
Hand washing a non-stick pan takes less than two minutes. A dishwasher cycle takes two hours. When you realise you are trading two minutes of your time for years of your pan’s life, the choice becomes incredibly simple.
The "Least-Worst" Way to Use a Dishwasher
Look, I get it. Sometimes life gets in the way and you absolutely have to use the dishwasher. If you find yourself in that spot, think of this as damage control, not a regular cleaning method.
To give your pan its best chance, place it on the top rack, where the water jets are gentler. The most important step, though, is to skip the heated dry cycle. Just turn it off. Choose an air-dry or eco-setting instead. This one change avoids the most destructive part of the process—the prolonged, intense heat. It’s still not ideal, but it’s a whole lot better than the full, high-heat assault.
The Best Tools and Cleaners for Non-Stick Cookware
Keeping your non-stick pans in top shape is less about elbow grease and more about using the right gear. What you clean with is just as important as how you clean. Honestly, it’s the difference between a pan that serves you well for years and one that’s scratched and useless in a few months. But don’t worry, you don’t need a cupboard full of expensive gadgets—just a little know-how.

The golden rule for non-stick surfaces is simple: be gentle. Your only job is to lift away food and grease without scuffing that delicate coating. This means soft sponges, microfibre cloths, and gentle nylon brushes are your new best friends. They’re tough enough to get the job done but won't harm the pan's surface.
Choosing Your Cleaning Arsenal
When you're stood at the sink, the tool you reach for can make or break your pan. Think of that non-stick coating as a fragile, high-performance finish that you need to protect at all costs.
Here’s what every kitchen should have on hand:
- Soft Sponges: A classic for a reason. Just make sure you always use the soft, non-abrasive side.
- Microfibre Cloths: These are fantastic for both washing and drying. Their tiny fibres are brilliant at trapping grease and polishing the surface without leaving lint behind.
- Silicone or Nylon Brushes: If you’ve got some stubborn bits of food clinging on, a brush with soft nylon bristles provides just enough friction to dislodge them without scratching. Anyone who cooks with silicone utensils already knows how safe and gentle silicone is on cookware.
The Definitive ‘Do Not Use’ List
Even more important than what you should use is what you must never use. The items below will cause irreversible damage, creating tiny scratches that food will grab onto, completely defeating the purpose of your non-stick pan.
The number one reason non-stick pans fail early is abrasive cleaning. Steel wool is the ultimate enemy—it acts like sandpaper on the coating and can permanently ruin the surface in a single, overzealous scrub.
Steer clear of these at all costs:
- Steel Wool and Metal Scourers: These are far too aggressive and will literally strip the coating off your pan.
- Abrasive Sponges: That green, scratchy side on a standard washing-up sponge? It’s designed to scour, and it will create thousands of micro-scratches on a non-stick surface.
- Harsh Chemical Cleaners: Things like oven cleaners or abrasive powders contain caustic chemicals that can chemically break down the non-stick coating.
To make it crystal clear, here’s a quick rundown of the heroes and villains of non-stick pan cleaning.
Safe vs. Harmful Cleaning Tools and Agents
| Category | Recommended (Safe for Non Stick) | To Avoid (Harmful to Non Stick) |
|---|---|---|
| Sponges & Cloths | Soft sponges (non-scratch side), microfibre cloths, soft-bristle nylon brushes, silicone scrubbers. | Steel wool, metal scourers, abrasive green/blue scouring pads, magic erasers. |
| Cleaning Agents | Mild washing-up liquid, bicarbonate of soda paste, white vinegar solution (diluted), warm soapy water. | Abrasive powders (Comet, Ajax), oven cleaners, chlorine bleach, harsh chemical degreasers, dishwasher pods (used directly on the pan). |
| Scraping Tools | Silicone spatulas, wooden spoons, plastic pan scrapers. | Metal utensils (forks, knives), metal spatulas, sharp-edged tools. |
Choosing from the 'Recommended' column will keep your pans slick and functional for much, much longer.
Pan-Safe DIY Cleaning Solutions
You don't need to fork out for specialist cleaners. Some of the safest and most effective options are probably sitting in your kitchen cupboards right now. These simple, eco-friendly solutions are kind to your pans, your wallet, and the planet.
For a brilliant all-purpose cleaner, just mix equal parts white vinegar and warm water in a spray bottle. It's fantastic for cutting through everyday grease and getting rid of any mineral deposits left by hard water.
If you’re dealing with that stubborn, sticky film of polymerised oil, a simple paste of bicarbonate of soda and a little water works wonders. Apply it to the problem spots, let it sit for 20-30 minutes, and then gently wipe it away. The mild alkali in the bicarb breaks down the baked-on grime without any harsh scrubbing needed.
Smart Storage and Maintenance Habits
Your pan is clean, dry, and ready to go—but the job isn't quite done. How you store your non-stick cookware is just as crucial as how you wash it. Simply tossing it into a crowded cupboard is a guaranteed way to get scratches and dings that will destroy that delicate surface.
The easiest, most effective way to store your pans is to stop them from touching each other. If you have to stack them, always slide a protective layer in between. You don’t need anything fancy for this; a clean tea towel, a sheet of kitchen roll, or a soft felt pan protector works perfectly. This simple barrier stops the bottom of one pan from scraping against the cooking surface of the one below.
Preventing Stacking Scratches
This one small habit makes a massive difference. Research shows that those tiny stacking scratches are a problem in 40% of UK homes with multiple pans. In professional kitchens, proper storage and cleaning can extend a pan's life by up to 50%, a practice we can all easily adopt at home. If you're interested in the numbers, you can explore the latest research on the UK non-stick cookware market.
An even better solution? Hang them up. A pot rack, whether it's hanging from the ceiling or mounted on a wall, keeps your pans separated. This way, they stay organised, are always easy to grab, and are completely safe from scratches.
Stacking pans without a barrier is the silent killer of non-stick coatings. You won't notice the damage happening, but one day you'll find your eggs are sticking, and those tiny, cumulative scratches are the culprit.
Routine Maintenance Checks
Beyond smart storage, a couple of quick maintenance checks will help keep your pan in top shape for years.
Every few weeks, give the handle a little wiggle. If it feels loose, grab a screwdriver and tighten the screw where it meets the pan. A wobbly handle isn't just annoying; it’s a genuine safety hazard. And speaking of safety, keeping your hands protected is vital; you can learn more by reading our guide to the best cutting-proof gloves for every task.
Finally, you need to know when it’s time to say goodbye. If the non-stick surface has deep scratches that expose the metal underneath, or if you can see it flaking off, the pan is done. No amount of cleaning or care can fix a physically damaged coating, and it’s time for a replacement.
Common Questions About Cleaning Non Stick Pans
Once you've got the hang of the daily clean-up, a few specific questions tend to crop up. Let's tackle these common kitchen dilemmas so you'll know exactly how to handle your non-stick pans, no matter what.
Can I Use Olive Oil And How Does It Affect Cleaning?
Technically, yes, you can use it. But should you? Extra virgin olive oil has a very low smoke point, which means it starts to burn and break down at relatively low temperatures.
When it burns, it creates a stubborn, sticky film on your pan through a process called polymerisation. This residue is a real pain to get off and will eventually destroy your pan's non-stick surface. For anything other than very gentle heating, you’re much better off with an oil that can handle the heat, like rapeseed or sunflower oil.
If you do find yourself with that sticky coating from burnt oil, the bicarbonate of soda paste method we covered earlier is your best friend for getting it off without damaging the pan.
A tacky, sticky feeling on your pan's surface is almost always a sign of polymerised oil. Letting a simple bicarb paste sit for 30 minutes can work wonders on this layer, saving you from any harsh scrubbing.
Is My Scratched Non Stick Pan Still Safe?
A few minor surface scuffs from everyday use? That's usually just cosmetic and nothing to panic about. The real concern is when the coating is deeply scratched, actively flaking, or peeling away. If you see that happening, it's absolutely time for a new pan.
Thankfully, modern PTFE coatings used in the UK are made without PFOA, so accidentally ingesting a tiny flake isn't a major health risk. The bigger issue is practical: a damaged surface simply doesn't work. Food will stick, cleaning becomes a nightmare, and those deep grooves can trap food particles, increasing the risk of bacteria.
To brush up on kitchen hygiene, our guide on how to prevent cross-contamination is packed with essential tips.


